In this guide, you'll learn how to use Steam's new Game Recording feature. Steam has introduced a game recording feature that is integrated directly into the client, enabling you to record gameplay for any game launched through Steam, including non-Steam games. This guide will walk you through how to enable, use, and optimize this feature.
Takeaways:
- How to set up and use Game Recording in Steam.
- Where to find and use the new Game Recording feature in Steam.
Table of Contents
How to Use Steams Game Recording Feature.
Steam's Game Recording Beta is similar to other game recording software like NVIDIA ShadowPlay. It allows you to record your gameplay, save clips, and share them with friends. This feature is built into the Steam client and includes a video editor for easy clip management.
Features of Steam Game Recording Beta
-
Record gameplay and save it on demand.
-
Built-in video editor to trim and manage clips.
-
Ability to record in the background, capturing the last 2 hours of gameplay.
-
Supports game highlights for just about every game on the platform
-
API availability for developers to integrate recording features into more games.
How to Enable Steam Game Recording Beta
-
Open Steam: Launch your Steam client.
-
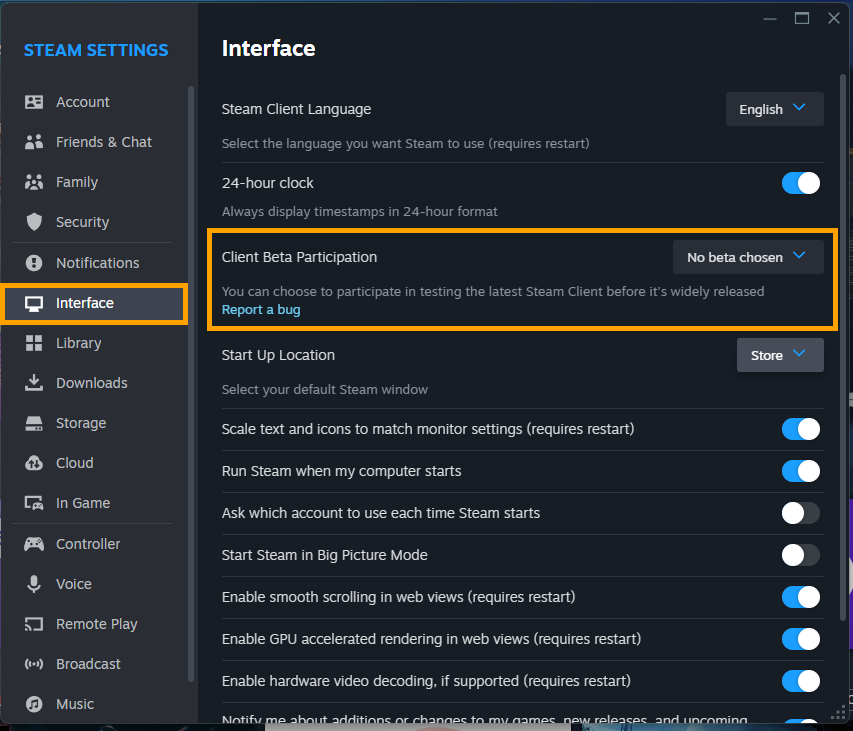
Click on Steam in the top-left corner and select Settings then, navigate to Interface on the left sidebar.
- Under Beta Participation, select Change and Choose Steam Beta Update from the dropdown menu.
-
Click OK and restart Steam when prompted.
How to Configuring Steam Game Recording Options
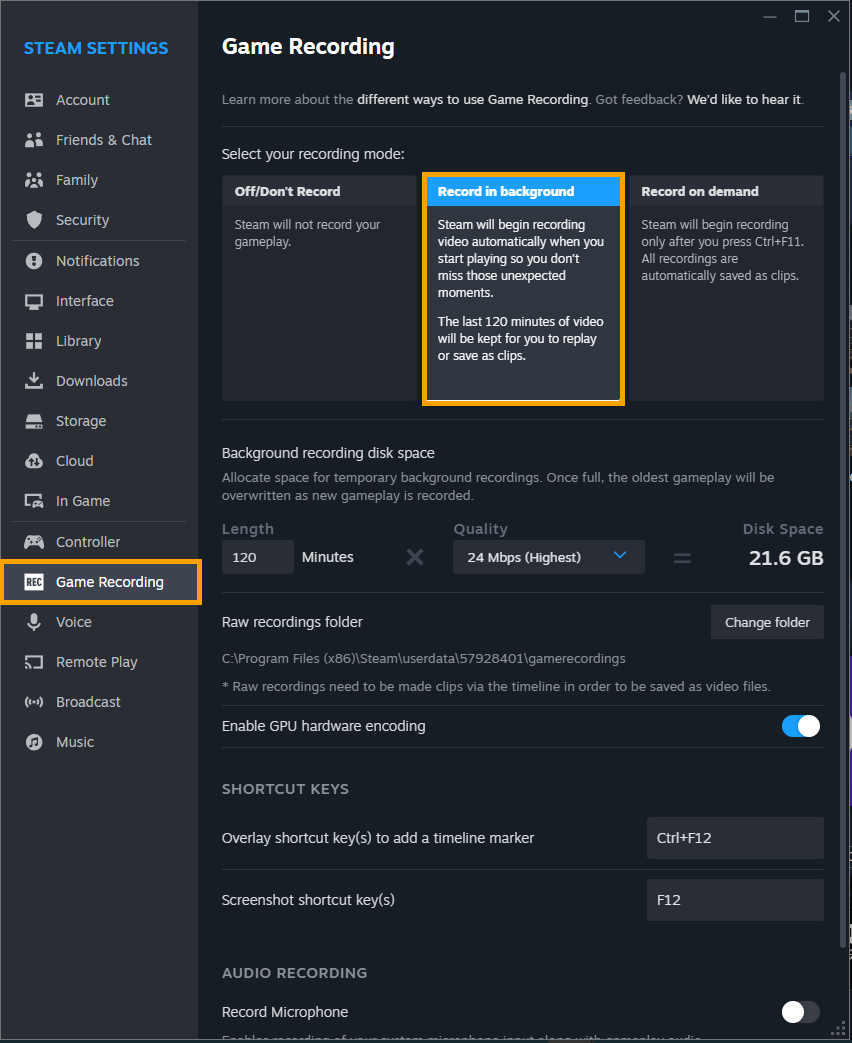
Go to Settings again and scroll down to find Game Recording then select a Recording Mode:
- Off: Disables game recording.
-
Record: Starts recording when you play a game.
-
Record in Background: Continuously records up to the last 2 hours of gameplay.
Adjust Recording Duration:
- Choose how long you want to record past gameplay (e.g., 2 hours, 4 hours).
-
Adjust the quality settings to manage disk space.
Choose Recording Folder:
- Click Change Folder to select a location for storing recordings. Consider using a larger drive if you have limited space on your primary SSD.
Enable GPU Hardware Encoding:
- Turn on hardware encoding to reduce performance impact. This is supported by most modern graphics cards from NVIDIA, AMD, and Intel.
Using Steam Game Recording Beta
- Start any game from your Steam library or a non-Steam game added to Steam.
- Use the hotkey Ctrl + F12 to start and stop recording.
- Press Ctrl + F12 while playing to add a marker for interesting moments. This helps you quickly find specific parts of your recording later.
How to Manage and Edit Recordings in Steam Game Recorder
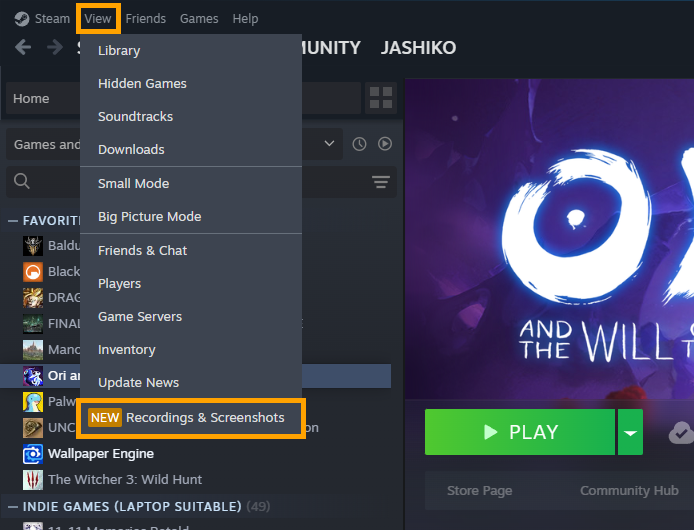
To Access Recordings: Go to View > Recordings and Screenshots in the Steam client.
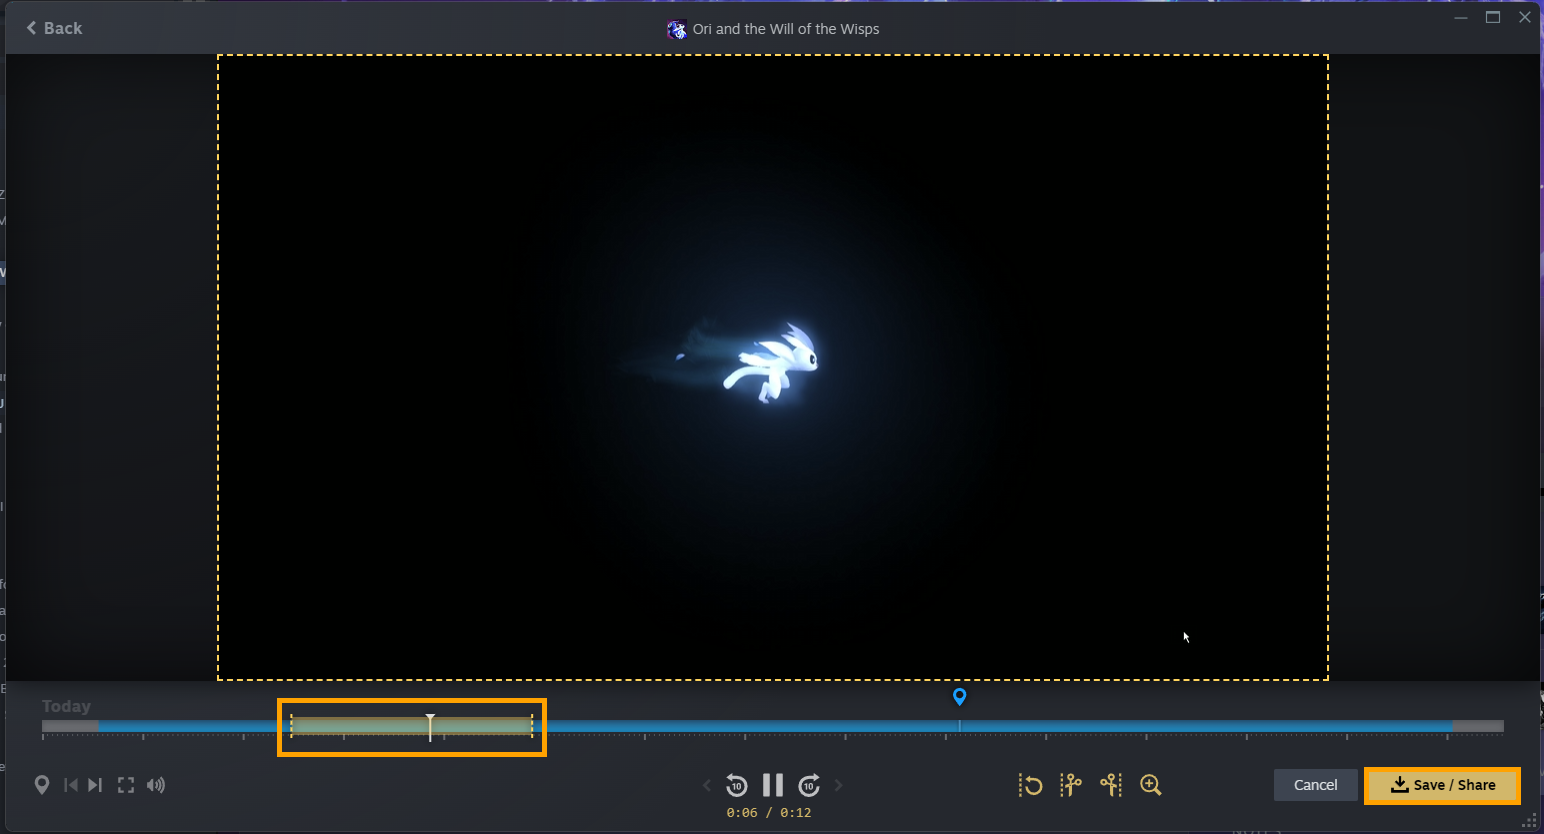
View and Clip Recordings: Find your recordings and use the built-in editor to clip specific parts. Drag the start and end points to select the portion you want to save.
Save and Share Clips: Click Save and Share to save your clips to Steam or export them as video files (.MP4). Use Copy to Clipboard to quickly share clips via Discord or other platforms.
How to use Use the Steam Overlay for In-Game Clips
- Press Shift + Tab while in a game to open the Steam overlay.
- Go to Recordings and Screenshots to view clips specific to the current game.
- Use the recording controls in the overlay to clip and save portions of your gameplay without exiting the game.
Steam Recorder Optimal Performance Settings
-
Disable Other Recording Software: Turn off other recording software like NVIDIA ShadowPlay to avoid performance issues.
-
Choose the Right Quality Setting: Adjust the recording quality based on your available disk space and system performance.
-
Record Microphone and Game Audio: Enable microphone recording and choose to record game audio only, system audio, or selected programs like Discord.
