DaVinci Resolve 20 introduced a ton of amazing new and powerful features but my absolute favourite new feature at the moment is called AI Audio Assistant, which makes audio post-production dramatically faster and smarter. Audio Assistant can automatically organise, process, and mix your timeline’s audio with just one click. It’s still in beta by man does it do an incredible job!

Takeaways:
- Learn how to use the new AI Audio Assist feature in Davinci Resolve.
- Where is the new Audio Assist AI feature in Davinci Resolve?
Table of Contents
What Does Audio Assistant Do in Davinci Resolve 20?
Of all the features recently released in Davinci Resolve 20, this is one of the biggest time savers. It uses AI (Locally) to do all of the following things.
-
Identify dialogue, music, sound effects, and ambience
-
Automatically assign them to appropriate tracks
-
Apply smart EQ, leveling, and processing
-
Optimize your mix for platforms like YouTube, Netflix, and more
-
Add tools like voice isolation, dialogue levelling, and auto-ducking
You can use it as a complete solution or as a starting point to fine-tune your audio. Even though it’s still in beta it’s surprisingly good already. There are a ton of other new AI features in Davinci Resolve 20 including some optimised AI music editor.
How to Use Audio Assistant in DaVinci Resolve 20
Start with your edit in place. Even if your audio is rough and unprocessed, that's totally fine. Audio Assistant is designed to take it from zero to polished. The only thing you need to have organised are your clips. With your clips in place the rest can be automated.
Make sure your timeline contains:
-
Dialogue (e.g., voiceovers or pieces to camera)
-
Background music
-
Sound effects
-
Ambient sounds
Duplicate Your Timeline (Recommended)
Before running Audio Assistant, it’s a good idea to create a backup:
-
Right-click on your timeline in the Media Pool.
-
Select Duplicate Timeline. This lets you revert if needed, especially since some settings may be hard to undo manually.
Launch Audio Assistant
-
Go to the Timeline menu at the top.
-
Select AI Tools > Audio Assistant.

Set Your Delivery Format
This is important as it will organise all of the audio levelling and finer details for the specific platform you are going to be uploading to. It does a pretty good job of it too.
-
Choose your delivery standard (e.g., YouTube, Netflix, Broadcast).
-
For most creators, YouTube is a solid default.
-
Click Auto Mix to start the process.
DaVinci Resolve will now do the following.

-
Scan and analyze all audio clips
-
Classify and organize them into labelled tracks
-
Add audio tools like Voice Isolation, Dialogue Leveler, and Auto Ducker
-
Balance levels and EQ for a platform-ready mix
Review and Fine-Tune the Audio Assistants' work
I've tried this on a few projects now and it does a damn good job, though I have found it gets even better results when you still put in a little bit of work early on. The more you give it to work with the more it understands what to do with it.
Once complete, you'll see:
-
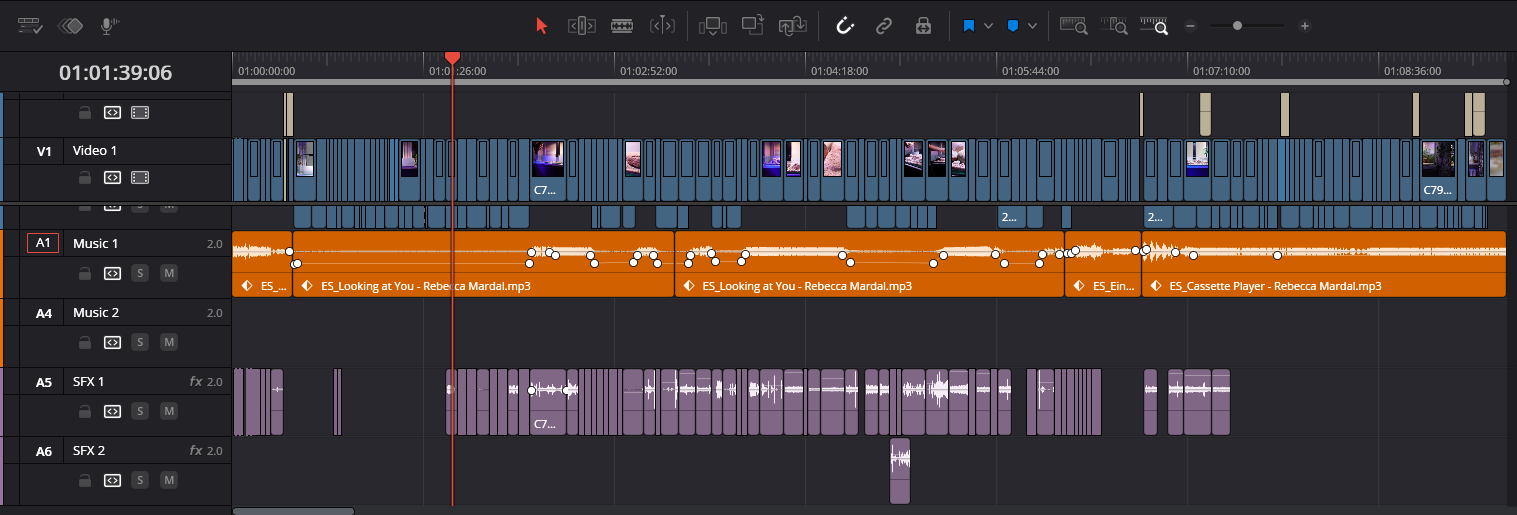
Color-coded audio tracks (Dialogue, Music, SFX, Ambience)
-
Automated effects applied in the Inspector (e.g., voice isolation on dialogue, ducking on music)
You can leave the mix as is or tweak it.