Speed ramping is a powerful technique that allows you to dynamically change the playback speed of your video to create dramatic or seamless transitions that speed up boring parts of clips. As ADHD editing styles are becoming more and more important to get engagement and traction Speed Ramping has become a super useful attention-grabbing tool. So here’s a step-by-step guide for speed ramping in DaVinci Resolve.

Takeaways:
- Where are the speed ramping tools in Davinci Resolve?
- How do you use speed ramping in Davinci Resolve?
Table of Contents
How to Speed Ramp in Davinci Resolve Tutorial
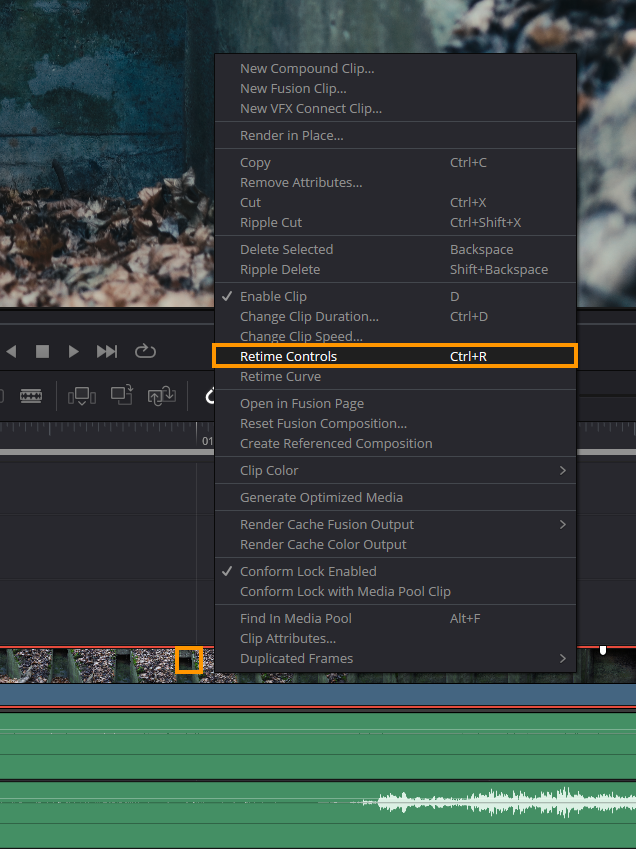
- Select the video clip in your timeline.
- Right-click on the clip and choose "Retime Controls" from the context menu.

- You’ll notice blue arrows appear above your video clip, indicating that retime controls are now active.
Add Keyframes for Speed Changes
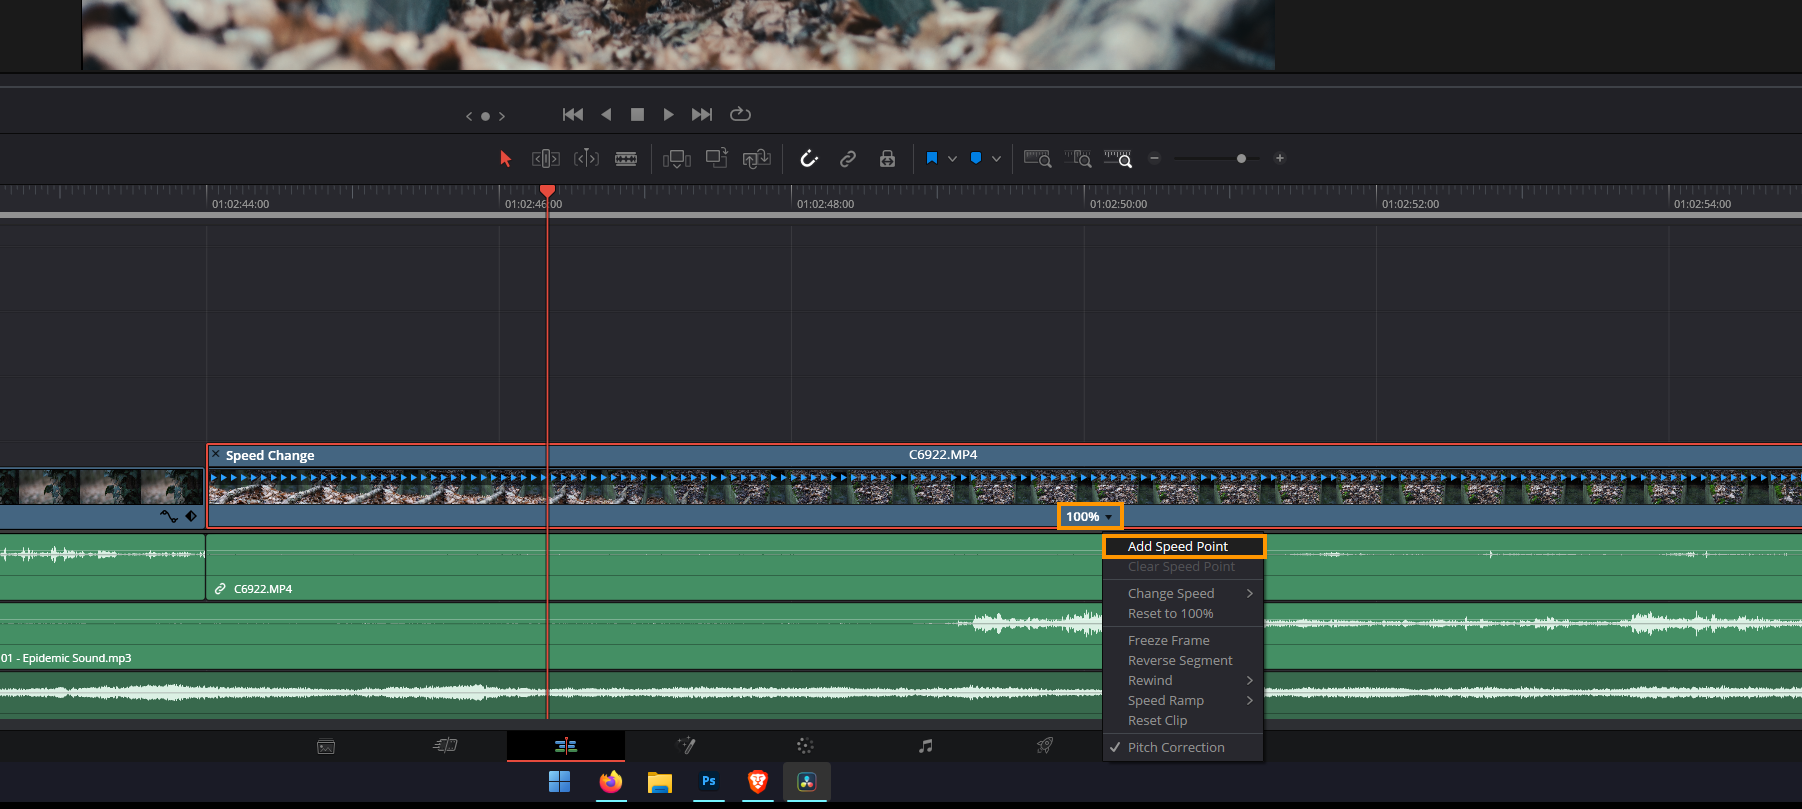
- Go to the section of your video where you want the speed change to begin.
- Click the dropdown menu next to the 100% speed indicator and select "Add Speed Point."

- Move to the next section of the video where you want the next speed change to occur. Repeat the process by adding another keyframe.
- Continue adding keyframes for each segment where you want to adjust the speed.
Adjust Playback Speeds
With keyframes added, your clip is now divided into segments. To change the playback speed for each segment:
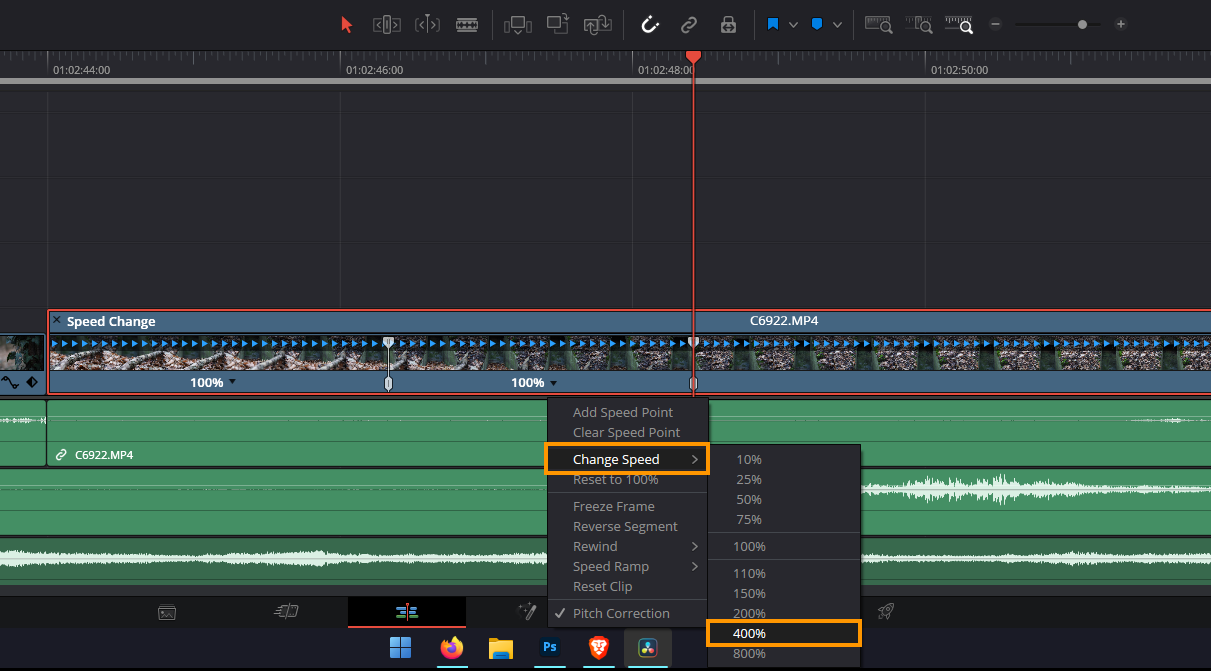
- Click the dropdown menu next to the speed indicator within each segment.
- Select "Change Speed" and input the desired speed percentage. For example, set the first segment to 75%, the second to 400%, and the third to 75% again.

- This creates a sequence where the video starts slow, speeds up dramatically, and then slows down again.
Smooth the Speed Transitions
To avoid abrupt changes in speed:
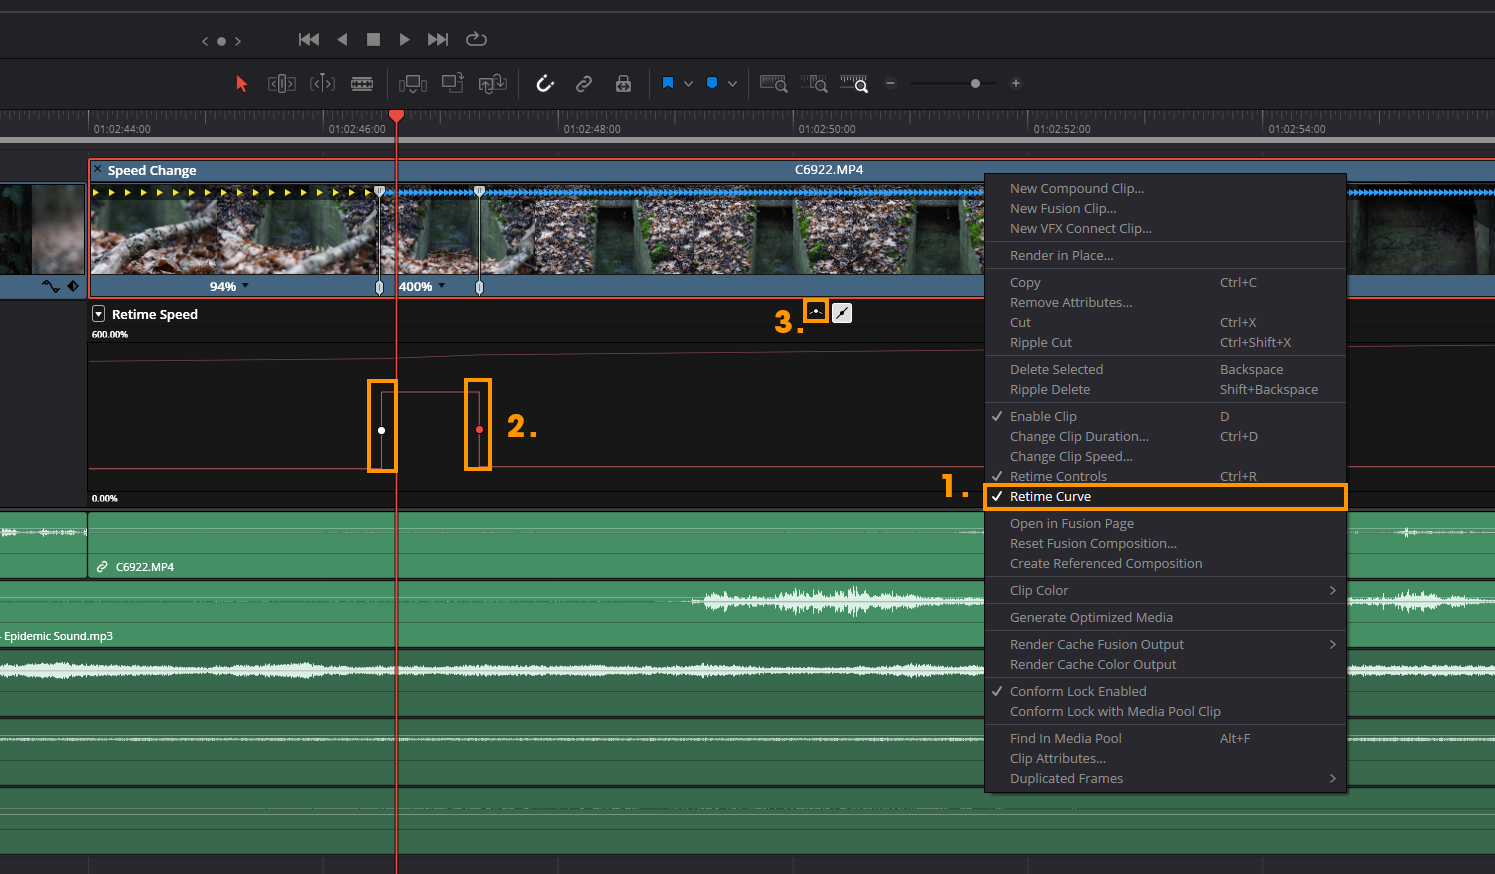
- Right-click the clip and ensure Realtime Controls is enabled. If not visible, enable it from the three-dot menu within the Retime Controls.

- In the Retime Curve window, highlight the keyframes.
- Click the smooth curve icon to make transitions between speeds more gradual.

- Adjust the curve handles to fine-tune the easing, ensuring a smooth acceleration and deceleration.
Enhance Frame Smoothness
When increasing playback speed significantly, frames may appear jarring or distorted. To fix this:
- Highlight the clip and open the Inspector on the right panel.
- Scroll down to the Retime and Scaling section.
- Under Retime Process, change the setting from Project Settings to Optical Flow. This setting improves frame interpolation, ensuring smoother playback.
Check Everything is exactly how you want it.
Play back the video to review the effect. You should see a smooth transition between speed changes, with no noticeable frame skipping or rough cuts. I've personally found that speed ramping works better with longer spacing as well. The second you start trying to jam it into tiny sections of a video things start to look quite jumpy.
