The latest version of Davinci Resolve got a ton of major updates including some awesome new voice-over features, including the ability to do voiceovers from the Edit page. But there is also a new IntelliScript option that works very similarly to a teleprompter so follow along as we show you how to use both of these brand new features.

Takeaways:
- How do you record voiceovers in Davinci Resolve 20?
- Learn how to enable IntelliScript in Davinci Resolve 20.
Table of Contents
How to Record Voiceovers and Use IntelliScript in DaVinci Resolve 20
There are a couple of different ways that you can do voice-overs in Davinci Resolve 20 so pick the method you prefer to use.
On the Edit Page:
-
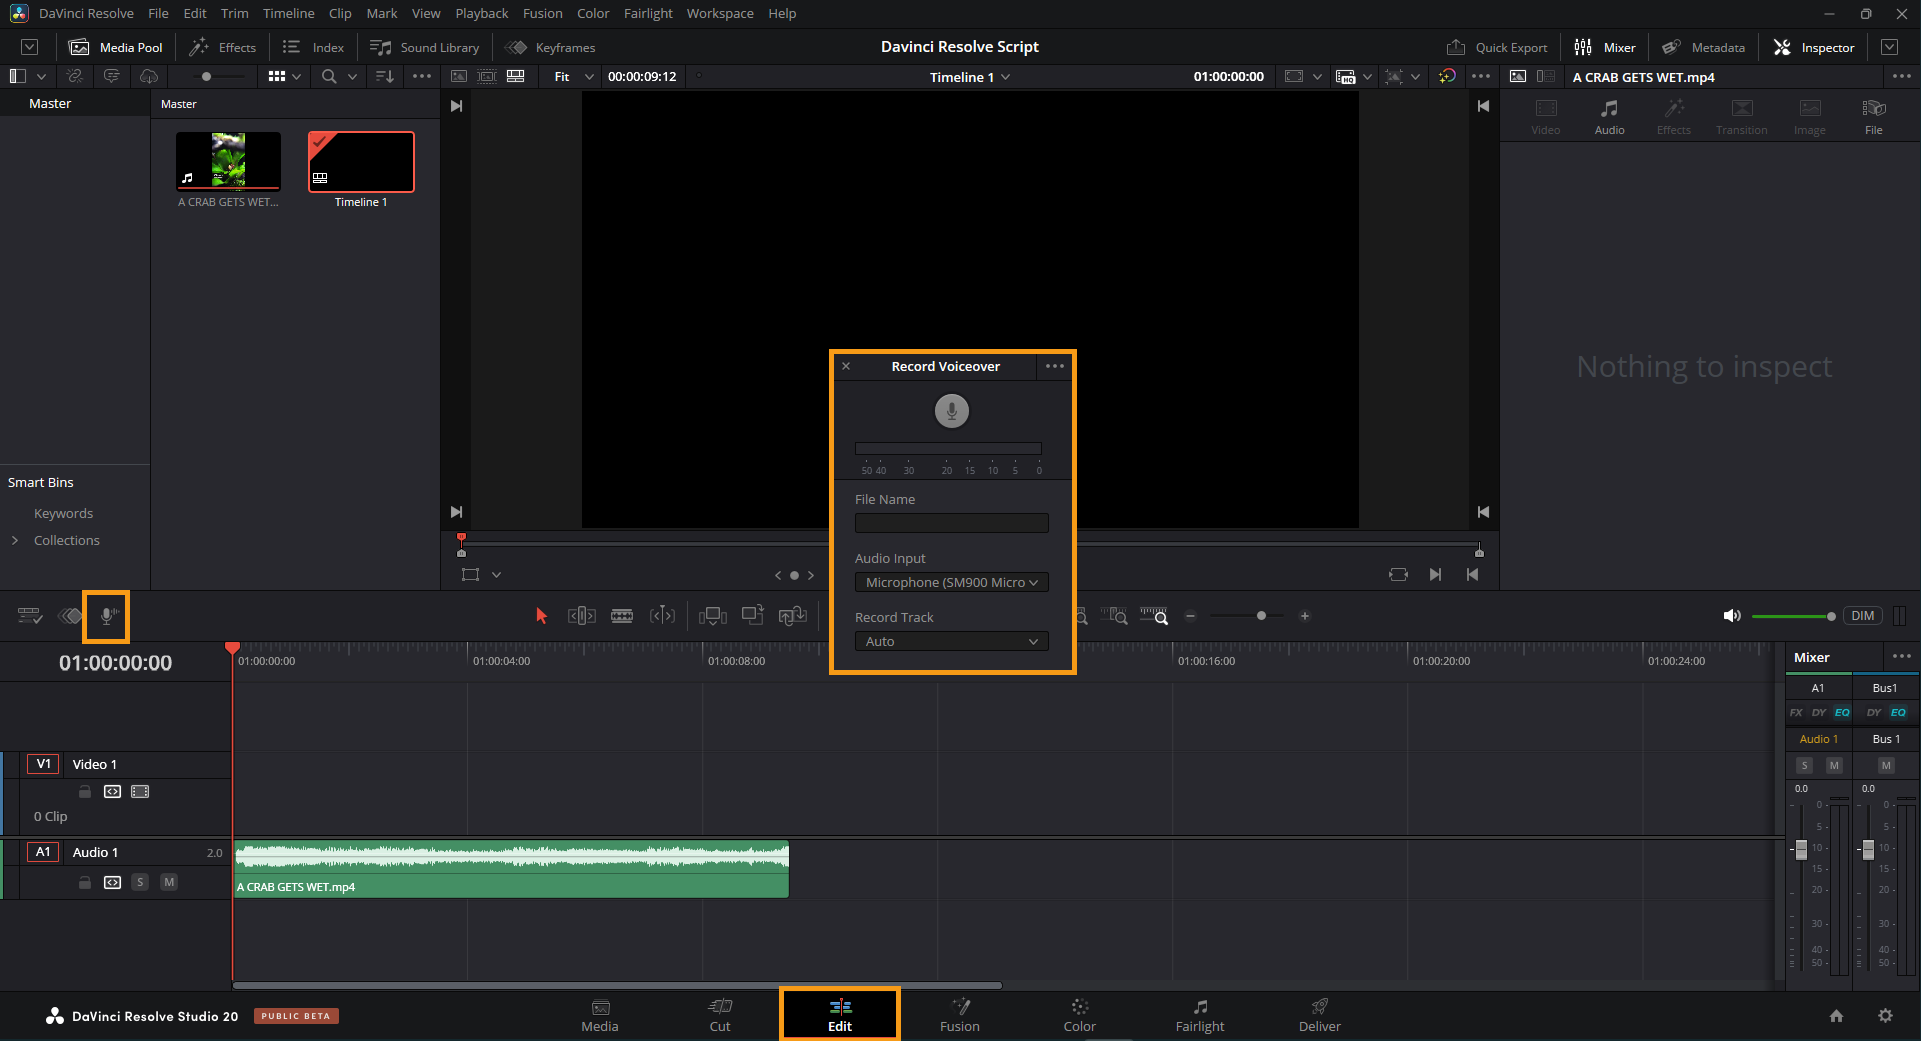
Find the New Voiceover Icon
Underneath the preview window, look for the microphone icon. Click it to open the voiceover panel.
-
Set Up Your Recording
-
File Name: Enter a name for your voiceover (e.g., test).
-
Audio Input: Choose your microphone (e.g., built-in mic, Elgato, etc.).
-
Track Selection: Choose which audio track to record to (default is “Auto”).
-
-
Open Advanced Options (Top right of the voiceover window):
-
Enable 3-Second Countdown: Gives you time to prepare before recording starts.
-
Mute Timeline Audio While Recording: Prevents background noise from interfering.
-
-
Start Recording
Hit Record to begin. A countdown will appear, then your audio will be recorded and shown on the timeline in real-time. -
Stop Recording
Simply click Stop when done.
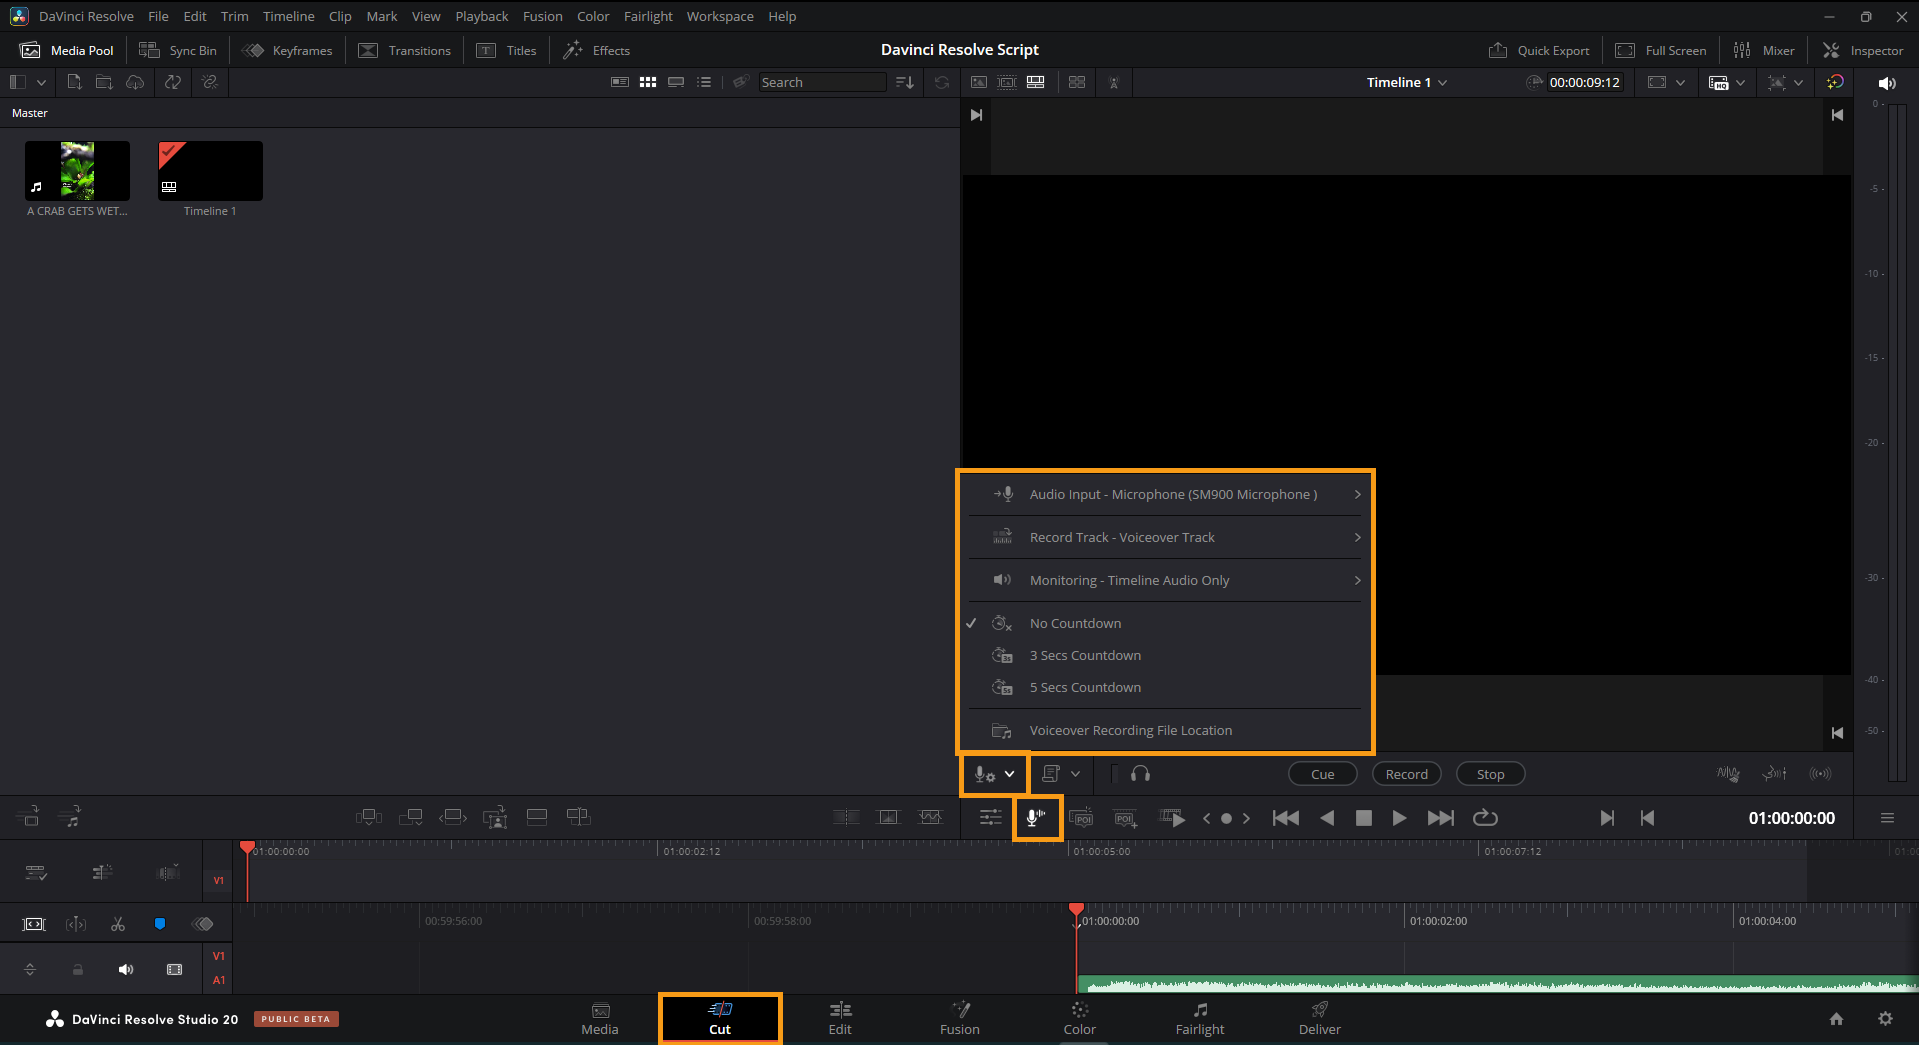
Voiceovers on the Cut Page (More Options Available)
- Click the Microphone Icon this is similar to the Edit Page, but with expanded tools.
Access Voiceover Settings
-
Input device
-
Audio track
-
Monitoring
-
Countdown timer
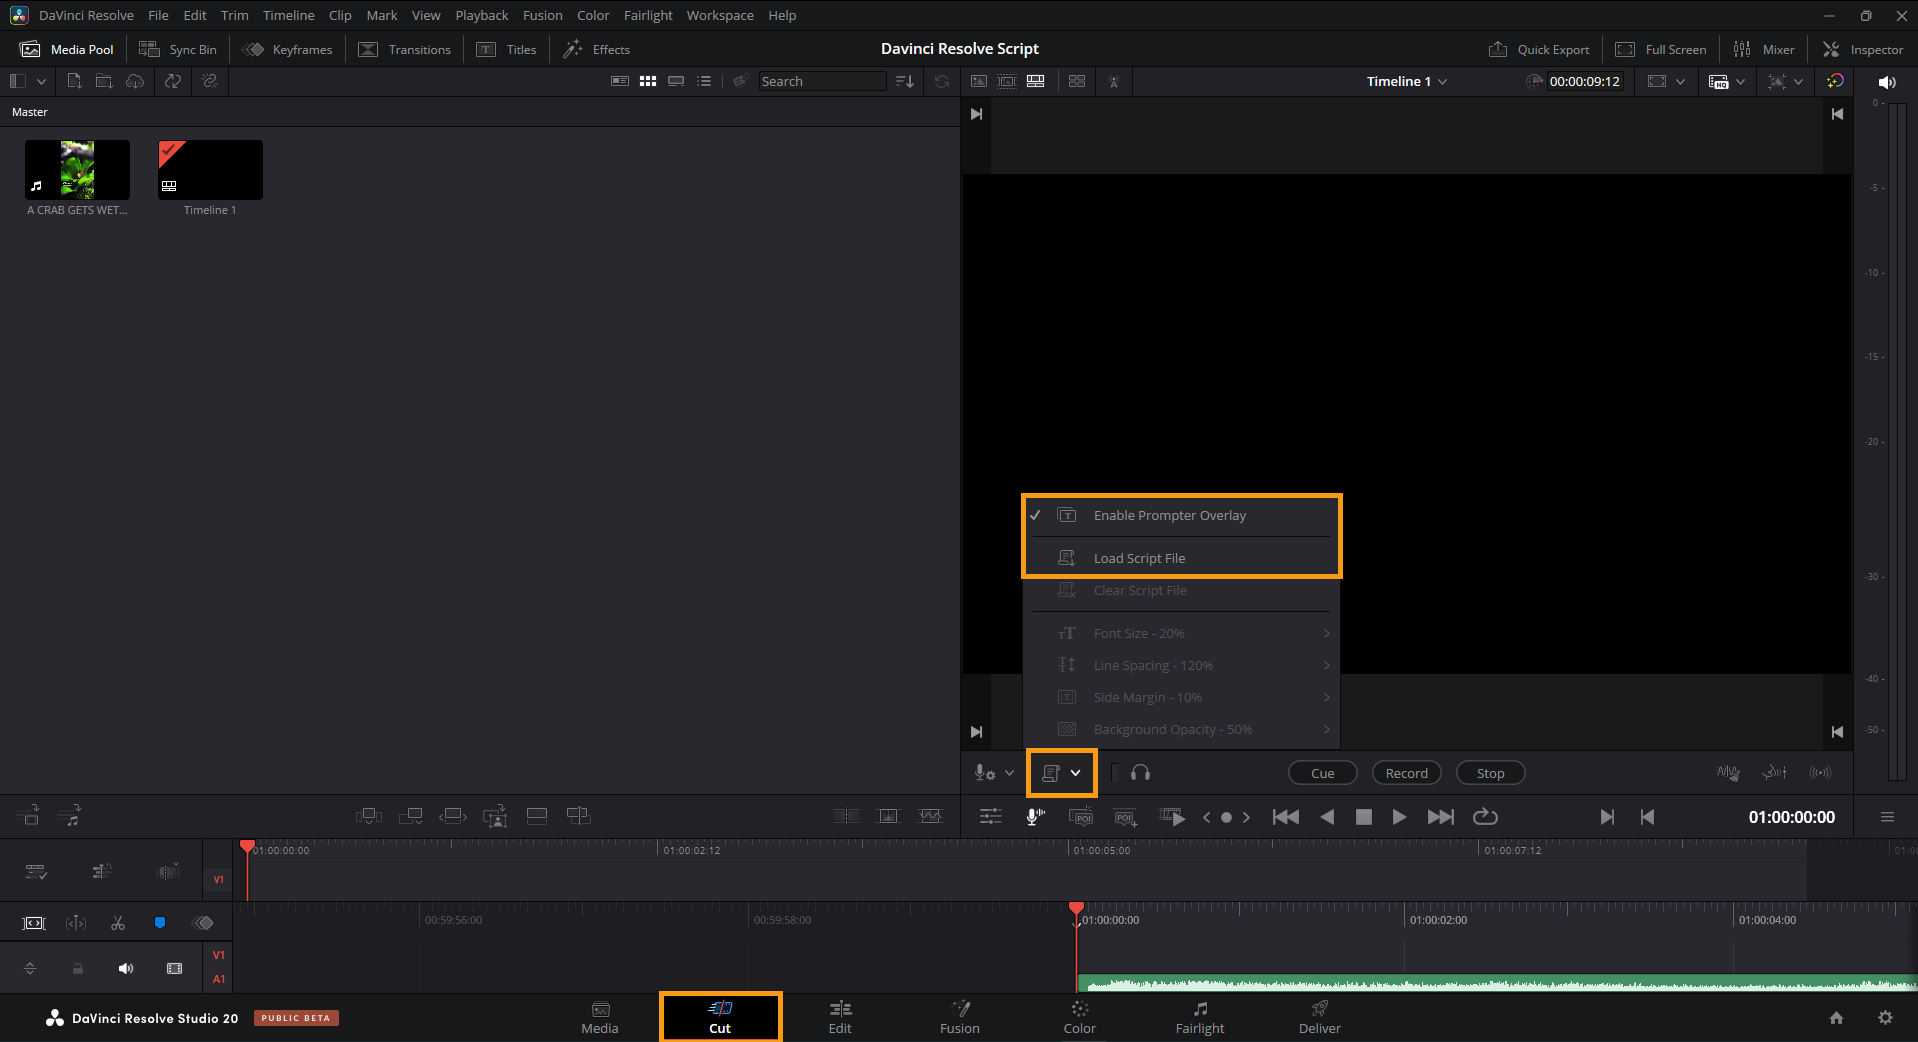
Script Integration
-
Load a Script: Use a plain .txt file. The script scrolls in sync with the playback for easy reading.
-
Customize Viewer: Adjust font size, spacing, margins, and background opacity.
-
Script Controls: Clear or hide the script anytime.
-
Cue, Record, Stop
-
Cue: Jump to your in-point (or start of the timeline by default).
-
Record: Begin recording in sync with your script.
-
Stop: Ends the recording.
-
Using IntelliScript for Script-Based Editing
Cut a Clip Using a Script
-
Save Your Script
Create a simple .txt file of your final dialogue or voiceover. -
Right-Click the Clip in Media Pool
Go to AI Tools > Create New Timeline Using IntelliScript. -
Select Your Script File
DaVinci Resolve will:-
Transcribe the clip’s audio
-
Match it to your script
-
Automatically place matching parts on the timeline
-
-
Review Takes
Incorrect takes are added as disabled clips so you can review or delete them as needed.