While most people focus heavily on video when making content for YouTube and other platforms, sound is actually far more important. So in this guide will show you how to quickly and easily optimise Audio in Davinci Resolve for YouTube.

Takeaways:
- How do you optimise sound in Davinci Resolve for YouTube?
- The best sound settings to use in Davinci Resolve for YouTube videos.
Table of Contents
How to Optimise Sound For YouTube in Davinci Resolve
Optimizing sound for YouTube in DaVinci Resolve is an essential step for creators to ensure their videos are professional, engaging, and clear. A well-mixed and balanced audio track can significantly improve the viewer's experience, ensuring your content is heard as intended. It will also help you get better traction on the platform as you will have better overall retention.
Normalize Audio Levels
You'll also want to make sure that your audio is loud enough to be heard but not so loud that it causes distortion or discomfort. YouTube recommends keeping your audio levels between -6dB and -3dB and fairly constant.
In DaVinci Resolve, you can normalize your audio by doing the following.
- Selecting the clip in the timeline.
- Right-clicking and choosing “Normalize Audio Levels.”
- Set the normalisation mode to YouTube.
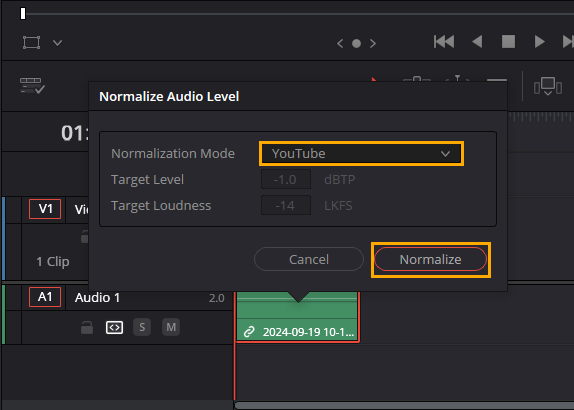
This will give you the best possible sound setting for your exports.
Use Equalization (EQ)
Equalization helps to shape the tone of your audio, making it clearer and more pleasant to listen to. I highly suggest grabbing the Marvel GEO plugin for Davinci Resolve. It's free, easy to use and makes a huge difference to voice-over tracks. If you're recording voice-over tracks in OBS I highly suggest following the steps in this guide as well. It will show you how to set up filters for your microphone.
It's also worth using Voice Isolation and Dialogue levelling in the Fairlight tab as well. Just toggle them on and the rest of the process is entirely automated.

Check Your Audio Mix with Multiple Devices
When you have finished your video, make sure you test it with a couple of different devices. Test it on your phone, test it with headphones and test it with speakers you'll be surprised how different things will sound across all of these devices.
Export Audio with YouTube Specifications
The final step is exporting your audio with the correct settings for YouTube. DaVinci Resolve has presets that you can use that will do this for you which saves a ton of time and gives really good results. Change to the Deliver Tab and do the following.
- Change to Audio
- Expand Audio Normalisation
- Then set the drop-down menu (Standard) to YouTube.
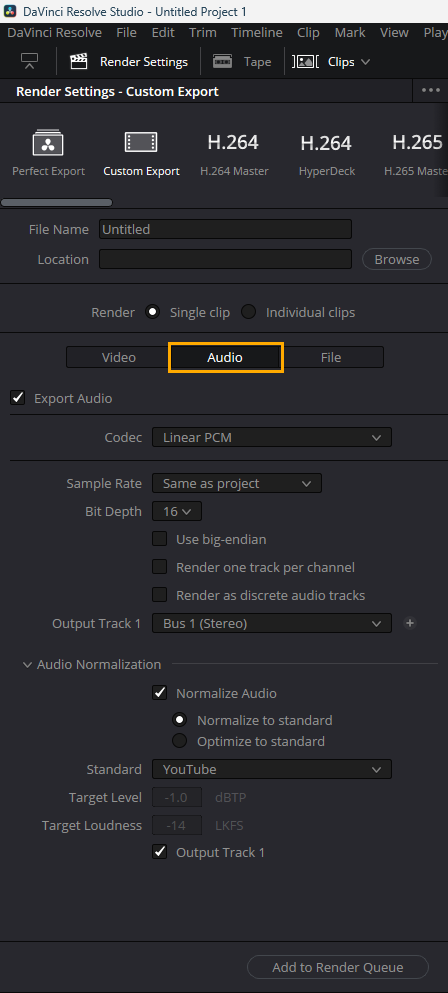
This will adjust your audio export for YouTube. Keep in mind that you still need to do all the other work to make it sound good, this will just fine tune your levels to get them within YouTube's guidelines.