Most people who use Davinci Resolve probably have a short list of fonts that they like to use for their projects and don't really need to spend time scrolling through hundreds of fonts every time they add text to their timeline. So this video will show you how to hide unwanted and unused fonts in Davinci Resolve. The feature is officially called limiting fonts in Davinci Resolve but that doesn't quite give you the impression of what it does.

Takeaways:
- How do you hide fonts that you don't use in Davinci Resolve?
- Can you hide fonts in Davinci Resolve?
- Where are the options to hide fonts in Davinci Resolve?
Table of Contents
How to Hide Unused Fonts in DaVinci Resolve 20
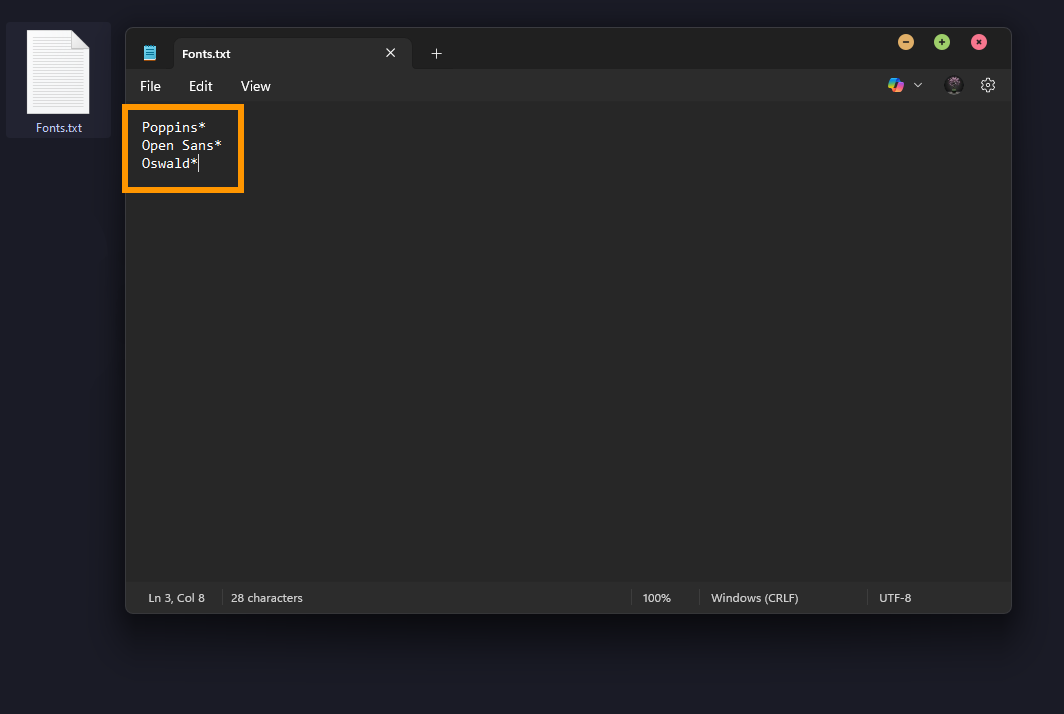
It's taken a while for this feature to drop into Davinci Resolve but it's finally here! So follow the steps below to hide fonts in Davinci Resolve. The first step is to create a plain text file on your computer. This file will contain the list of fonts you want to appear in DaVinci Resolve. You can include the full names of the fonts or use an asterisk as a wildcard to include any font that starts with a certain word. For example, writing "Helvetica*" will include all Helvetica font variations, like Helvetica Bold or Helvetica Light.
Hiding Fonts in Davinci Resolve
Write one font name per line. This helps DaVinci Resolve identify and match them correctly. You might include fonts like:
Poppins*
Open Sans*
Oswald*
In this example, the wildcard (*) next to all of the fonts will include all versions of those fonts. If you don't want all the versions of the font and just the basics, you can leave out the (*)
Once you’ve finished entering your list of preferred fonts, save the file as a .txt file. It’s a good idea to name it something like "resolve-fonts.txt" so you can find it easily later.
Open Preferences in DaVinci Resolve
After saving your font list, open DaVinci Resolve. In the top-left corner of the screen, click on the “Resolve” menu and select “Preferences.” This will open the preferences window where you can adjust a wide range of settings. Make sure you are in the “User” tab at the top of the window because this setting is applied per user rather than globally.
In the left-hand sidebar, click on “Editing.” This section contains options related to how your timeline and editing interface behave.
Scroll down through the editing preferences until you find the section labelled “Display only specific fonts.” This is a new feature in version 20 and may not be immediately visible in older versions of the software.
Connect Your Font List
Next to “Display only specific fonts,” click the “Browse” button. This will allow you to locate and select the text file you created earlier. Navigate to where you saved your font list file, select it, and confirm your selection.
After that, click the “Save” button in the preferences window to apply the change.

Verify the Change in the Text Tool
To see if the change has taken effect, open a timeline and add a Text+ title. Open the font dropdown, and you should now see a much shorter list of fonts. Only the fonts included in your custom text file will appear. This makes it faster and easier to select the ones you use most often without having to scroll past every font installed on your system.
Note: All fonts will still appear when using the standard Text title, there's nothing you can do to change that sadly.
This feature is especially useful for motion designers, editors, or content creators who consistently use a specific set of fonts in their branding or projects. It also reduces the visual clutter in the font selection tool, helping you work more efficiently.
If you ever want to update your list, you can simply go back to the text file, add or remove fonts, and restart DaVinci Resolve. The updated list will be loaded the next time the application launches.