The Search Box on Windows 11 is a handy tool that lets you find content on your computer, though it is a little bit hit and miss sometimes, even when it is working as intended. If for some reason you can't type in the Windows 11 Search Bar you'll need to work your way through the following steps to solve the problem.

Takeaways:
- Learn how to fix Can't Type in the Windows Search Bar on Windows 11.
- Why can't I type into the search bar on Windows 11?
Table of Contents
How to Fix Can't Type in Windows 11 Search Bar
Ninety-nine percent of the time when something breaks on Windows 11, like the Search Bar, for example, a Windows update is at fault. If it isn't a Windows Update it's user error, though in this case, you can pretty much rule out user error entirely so work your way through some of the fixes below. They are listed in order of what's most likely to work.
How do you uninstall bad updates on Windows 11? Remove a bad Windows 11 update.
To start the process of uninstalling updates on Windows 11, you’ll need to do the following. When you have to choose the update to remove, start with the most recent. It's usually the one that caused all of your problems.
- First, open the Settings app by pressing the Windows Key + I on your keyboard or by searching Settings from the Start menu.
- Next, click Windows Update in the left-hand pane of the main Settings screen. This will take you to a new page where you will need to clickUpdate history.
- Once you have clicked Update history, scroll down to the bottom of the page and click Uninstall Updates.
- This will open the Control Panel and show you a list of updates that can be uninstalled. Simply right-click on an update and select Uninstall, then follow the semi-automated process shown by Windows.
.png)
Run the SFC and DISM Tools to Fix KB5041582 Installation Issues
Running the System File Checker (SFC) and Deployment Imaging Service and Management Tool (DISM) can help fix installation issues by repairing corrupted system files. Follow these steps:
-
Type CMD into the Start menu, then right-click on Command Prompt and select "Run as administrator."
-
In the Command Prompt window, enter the following command and press Enter
sfc /scannow
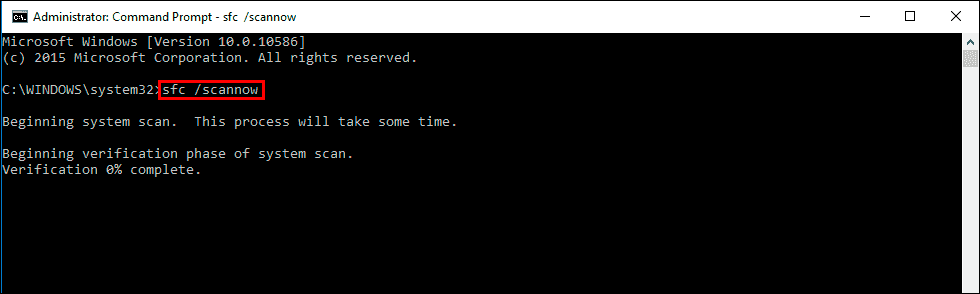
Note: If any errors occur they should be fixed automatically. However, if they aren't restart your computer in safe mode and run the scan again.
-
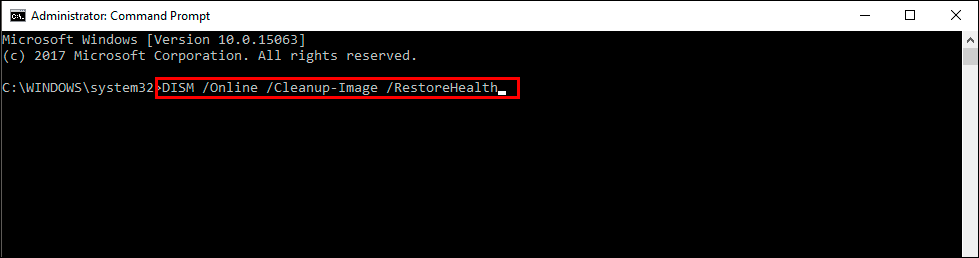
If the SFC tool returns an error, open Command Prompt as Administrator again, and enter the following commands one by one:
DISM /Online /Cleanup-Image /CheckHealth DISM /Online /Cleanup-Image /ScanHealth DISM /Online /Cleanup-Image /RestoreHealth
Rebuild the Windows Search Index
- Open Control Panel.
- In the top-right corner, change the View by option to Small icons.
- Select Indexing Options.
- Click Modify, then select the locations you want to index and click OK. If you don't see the location, click Show all locations at the bottom-left.
- Back in the Indexing Options window, click Advanced.
- Under the Delete and Rebuild index section, click Rebuild. This process may take a while, depending on the size of your drives, and search functionality may be limited during this time.
- Once complete, click OK.
Restart Windows Search Service
- Open the Start menu, type Services, and press Enter.
- Scroll down to find Windows Search.
- If the service is already running, right-click and select Restart.
- If it's not running, double-click it, set the Startup type to Automatic, and then click Start.
- Click Apply, then OK.
Re-register the Search Box using PowerShell
- Press Win + X and select Windows Terminal (Admin) or PowerShell (Admin).
- Confirm any User Account Control prompts by clicking Yes.
- In the terminal, type the following command:
Get-AppXPackage -AllUsers | Foreach {Add-AppxPackage -DisableDevelopmentMode -Register "$($_.InstallLocation)\AppXManifest.xml"}
- Press Enter, then restart your computer.
Update Windows
- Right-click on the Start button and select Settings.
- Go to Windows Update or Update & Security.
- Click Check for updates or Install updates.
- Let the process complete, then restart your system.
Create a New User Account
- Open Settings and go to Accounts.
- Click on Family & Other Users.
- Under Other users, select Add account or Add someone else to this PC.
- Follow the prompts. If you don’t have Microsoft account details, choose I don’t have this person’s sign-in information, then select Add a user without a Microsoft account.
- Set up a username and password.
- After creating the account, return to the Family & Other Users section, select the new account, and click Change account type.
- Choose Administrator, then click OK.